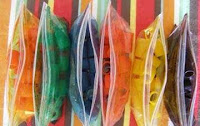
Dyed pasta or rice was in constant supply at my pre-school. This is an easy DIY tutorial...very kid friendly, if you'd like to have them help you. :-)
There are two recipes for dying pasta and rice. One uses rubbing alcohol (this is for crafting ONLY) while the other uses white vinegar (this is the food safe edible version). Since we never cooked and served our dyed pasta, the recipe we used was the one with the rubbing alcohol. Both versions are essentially the same, the only difference is the liquid.
SUPPLIES
- Mixing containers: glass bowls OR glass jars with lids (like empty pasta sauce or mason jars) OR plastic ziploc bags. Number of containers needed will depend on how many different colors you'd like to make.
- 1 or 2 cookie sheets
- For drying: Line your cookie sheets with one of the following...wax paper, several layers of news paper or kitchen towels (old or dark towels that you don't care too much about). I wouldn't recommend using paper towels, it's a little flimsy when wet and the pasta/rice might stick to it while drying...just creating more work for you. I find the kitchen towels easiest.
- Pasta: variety of fun shapes and tube pastas
- Rice: plain white rice
- Rubbing alcohol or white vinegar - enough to just cover the pasta (NOTE: only the pasta/rice dyed with vinegar is edible)
- Food coloring (the traditional little teardrop liquid food dyes are perfect)
- Latex gloves (optional)...if the food coloring gets on your hands, it won't be there forever. ;-)
- Colander (optional) keep in mind that this project might stain a white plastic colander...you could also use a slotted spoon.
INSTRUCTIONS:
- Divide your pasta/rice into your mixing containers
- Add liquid (either alcohol or vinegar) just enough to cover the pasta/rice
- Add your drops of food coloring (5-10 drops depending on size of your container and how intense you'd like your color). You can use the food coloring as is (they usually come in primary colors) or combine them to make new colors....like red + blue = purple...the box of food coloring should have a color mixing chart on the back with color recipes.
- If you are using glass bowls, stir to mix the colors and coat the pasta/rice. If you are using jars, screw on the lids and give 'em a shake. If you are using ziploc bags, zip tight and gently shake or squeeze to blend and lay on cookie sheets in case of leakage.
- The longer they sit, the more vivid the color. When I did this for the school, I would let them soak between 2 and 4 hours (some colors soak in really quickly while others, like yellow or orange, can take a little longer). Check on your containers every half hour or hour and give the contents a quick mix to make sure all your pasta or rice gets good coverage...(the jars are easy and fun for the kids...have them hold a jar tight and do a little shake and a shimmy!
- Drain with a colander (For Rice: line colander with paper towels so you don't loose a bunch through the holes) or use a slotted spoon to remove pasta/rice from container and place in a single layer on your cookie sheets (lined with wax paper, newspaper or kitchen towels) to dry. The colors will brighten as the pasta and rice dry.
 |
| Jar option |
 |
| Plastic bag option (you can use sandwich size or larger bags for more pasta) |

Voilà! You now have fun and colorful pasta & rice!
PROJECT IDEAS:
- You can use your fun shaped pasta & rice for glue projects
- Tube pasta can be used to string necklaces and garlands (stringing is fantastic in helping children develop their fine motor skills)
EDUCATIONAL USES:
Dyed pasta is not only limited to gluing and stringing...we often used it as an educational opportunity in our classrooms.
- SORTING & GROUPING: Sorting is a beginning math skill. Having children match up objects that have traits in common (in this case...the pasta's shape & color) helps them develop and organize these pre-math skills.
- PATTERN RECOGNITION: Being able to identify what comes next in a pattern is also an important pre-math skill. Use the colorful tube pastas that you've made to practice pattern making with your kids! Stringing necklaces and garlands is perfect for this.
COOKING:
How fun would it be to have your project also be a part of your dinner?! AGAIN...be sure you made these colorful creations with vinegar and NOT alcohol.
Using a dark tomato sauce kinda defeats the purpose of the colored pasta, but how about some simple and yummy buttery pasta that shows off the colors!?! OR...some awesome green rice or perhaps a rainbow rice ball? I mean...what kid wouldn't at least try this?
{all photos for this blog post were found via Google image search}
I hope you and your lil ankle-biters enjoy this project. Until next time...have fun & get messy!
- Jenna


.jpeg)


this looks fun! i'd like to try this as an adult.
ReplyDeleteHi Jenna! It's Tricia, your Venice Facebook virtual pen pal! That's a mouthful...
ReplyDeleteAnyway, I absolutely love this project! It's so easy and can be used in so man different ways educationally. I also loved the post where you tell us what supplies to buy; I'm so NOT crafty, I need complete hand-holding when it comes to every step in the crafting process :)
Congrats on the blog getting up and going!! It looks fantastic!! I subscribed to your posts :) Can't wait to learn from you!