
Which hat will your ankle-biters wear?
When I taught pre-school, we made these hats every year at Thanksgiving time. They are SOOOO unoriginal and every school in America probably makes them, but I guess that's also what makes them a traditional children's holiday craft. So, this year, what hat will YOU wear?
PILGRIM BONNET
SUPPLIES:
- 12" x 15" sheet of heavy white paper (I used poster paper)
- White yarn or ribbon
- Hole punch
- Scissors
- Stapler
 |
| diagram from makingfriends.com |
For INSTRUCTIONS:
click HERE!
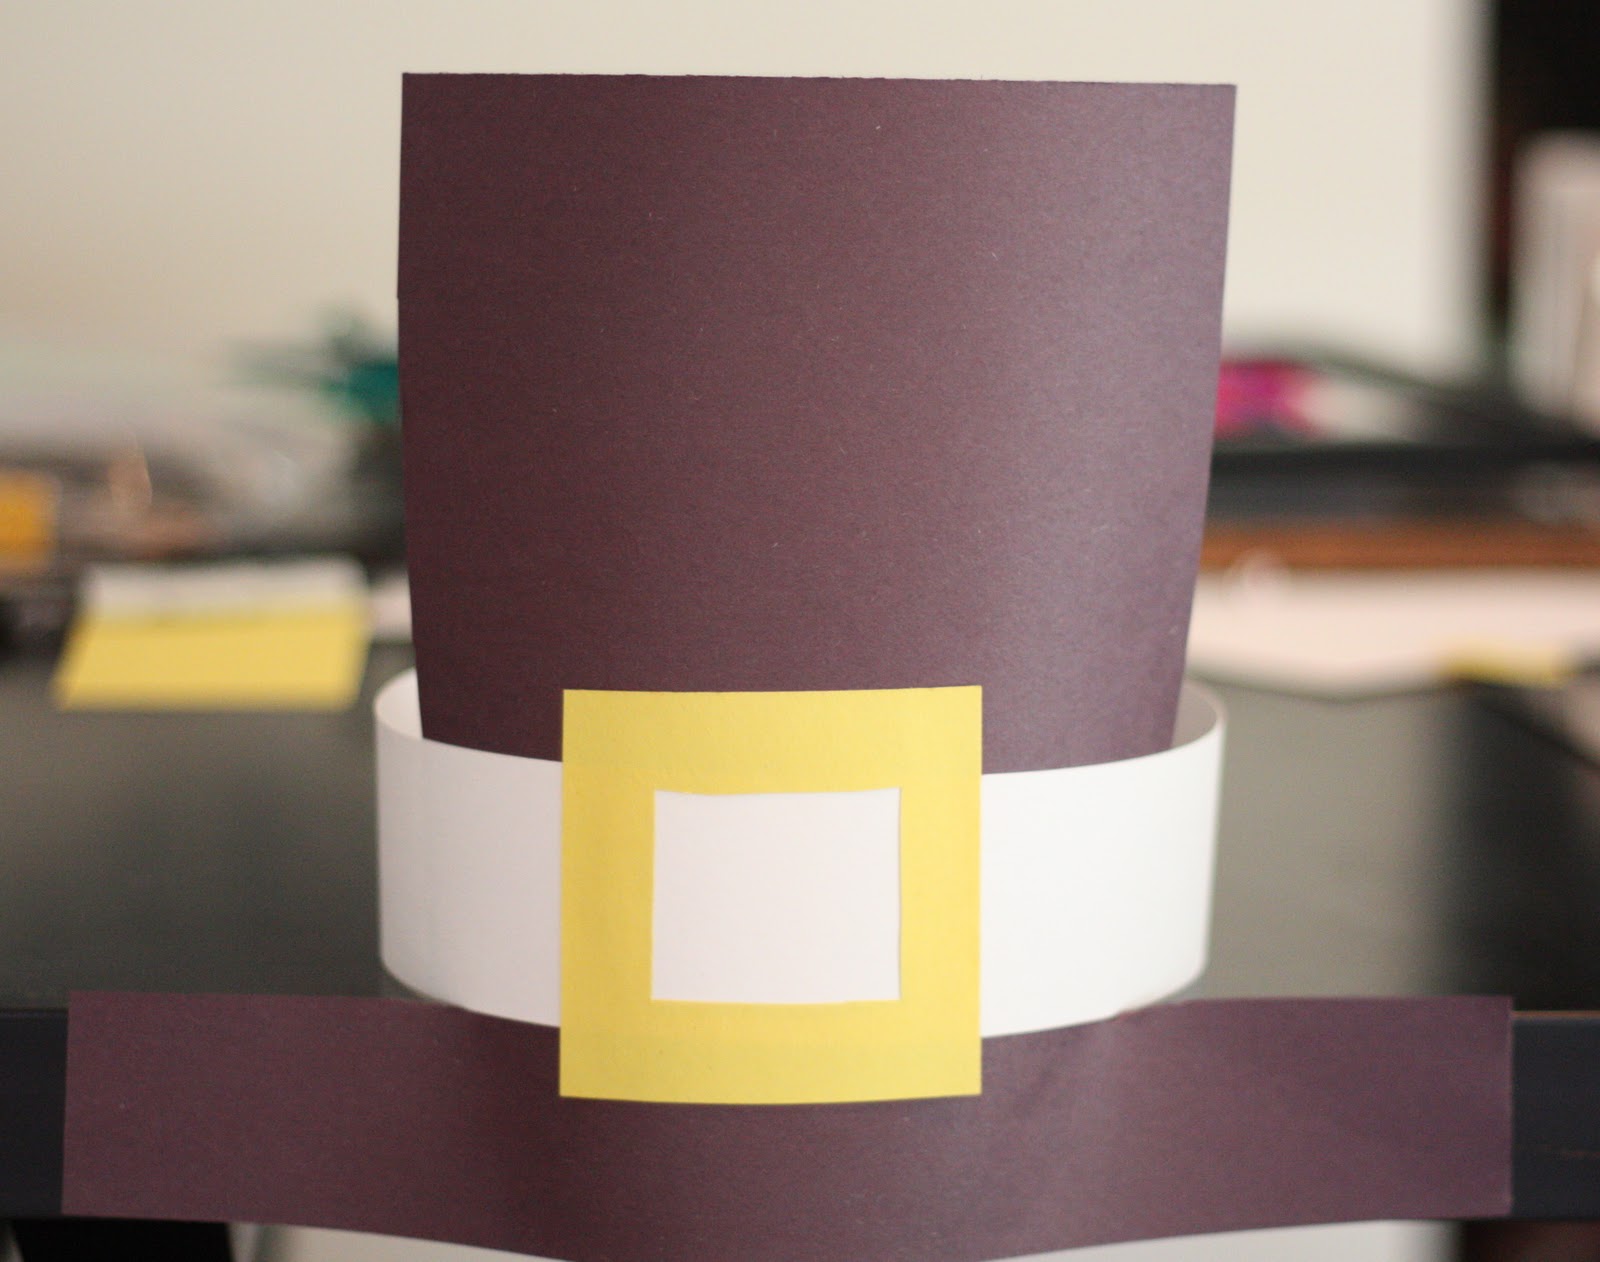
PILGRIM HAT
SUPPLIES:
- Black heavy weight paper - I used construction paper (because that's what I had), but poster paper would probably be better
- 2" strip of heavy weight poster paper - measured and cut to fit the wearers head
- 3" x 3" square of yellow construction paper
- Glue stick
- Stapler
INSTRUCTIONS:
1.) Cut the shape of a basic top hat out of the black paper.
2.) Trace a square (about 1 1/2 x 2 inches) inside the yellow square of paper and cut it out. Measure, cut and staple the white headband strip.
3.) With the glue stick, add a think line of glue to the hat (just above the brim section).
4.) Attach the hat to the inside of the white strip. Press & hold (the black paper will form to the contour of the headband.

5.) With the glue stick, attach the yellow cut out square (the buckle) to the outside of the white band.
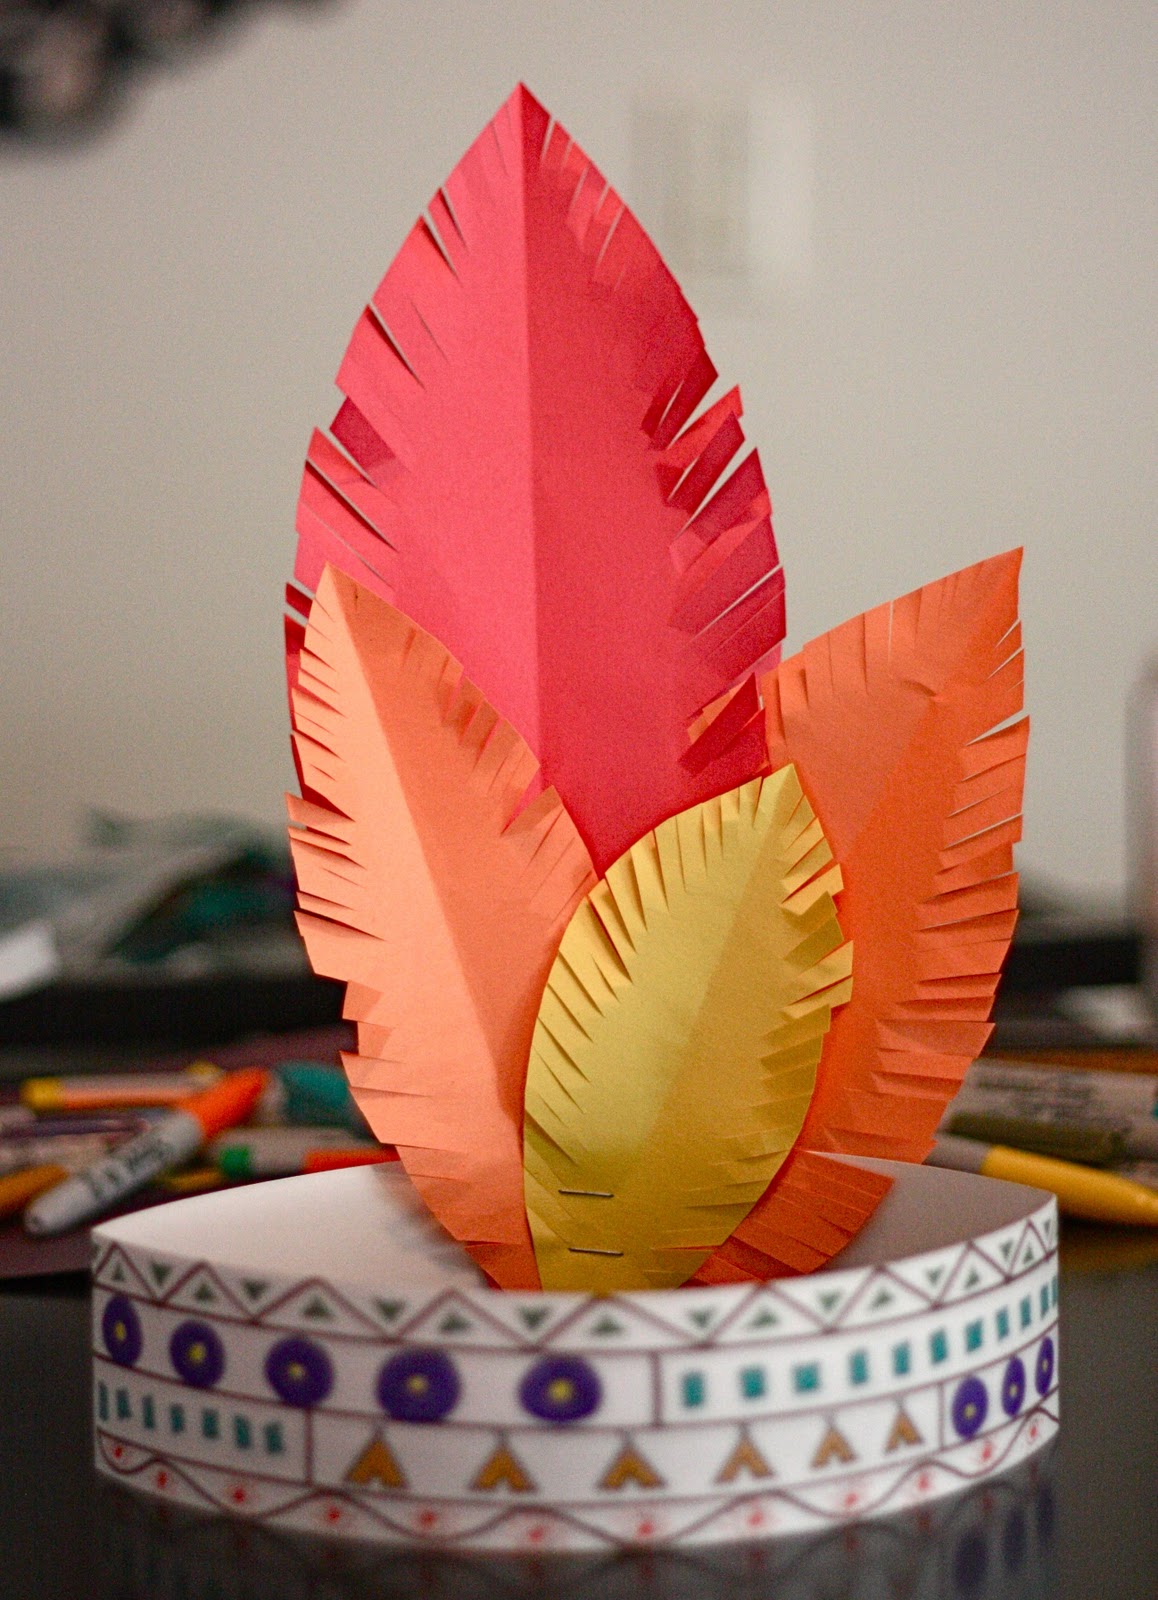
NATIVE AMERICAN HEADDRESS
SUPPLIES:
- 2" strip of heavy weight poster paper - measured and cut to fit the wearers head
- Crayons, markers or colored pencils
- Stapler
- Construction paper in colors red, yellow and orange
- Scissors
INSTRUCTIONS:
Measure and cut the length of white paper for the headband and decorate with the drawing utensils. If the children are old enough to replicate patterns, try introducing some images of Native American motifs. A quick Google image search can yield a lot of inspiration. Otherwise, allow children to free draw on their headbands.
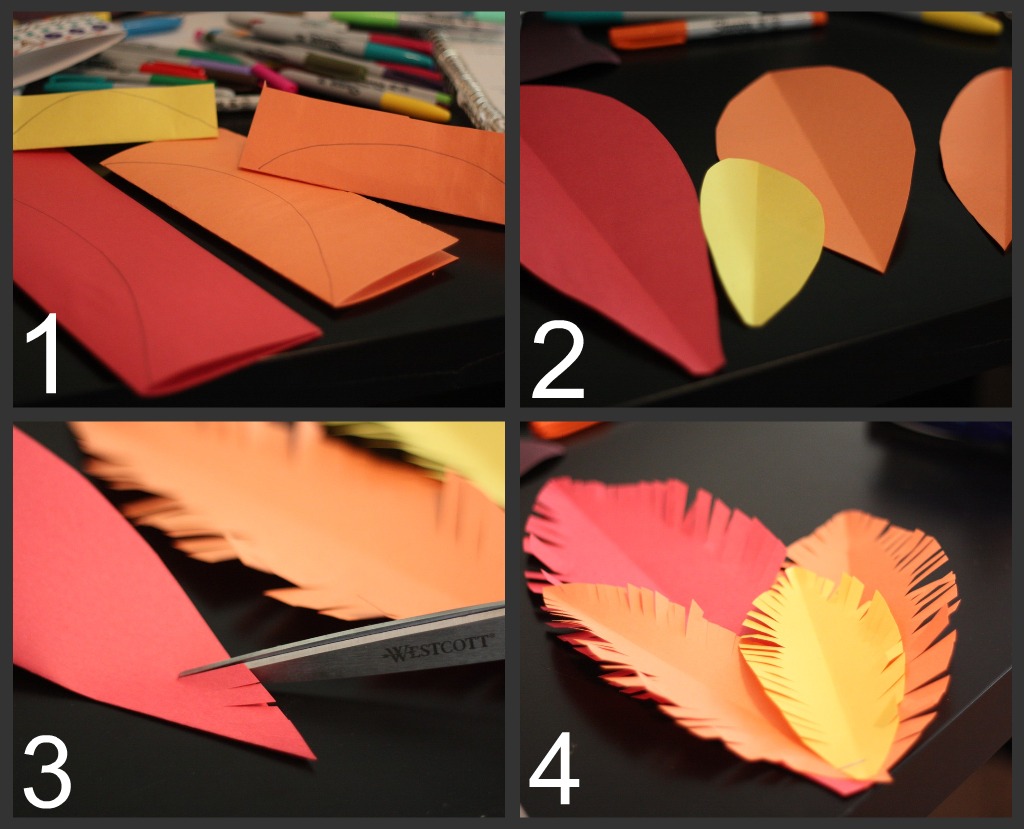
FOR THE FEATHERS
1.) Fold strips of construction paper in half (you can vary the sizes) and draw a pointed semi-oval on the folded side.
2.) Cut out the shape on the folded half of the paper. You should now have a full feather shape when opened up.
3.) Fold the feather in half again and (with the scissors) make diagonal snips down the length of the side without the fold.
4.) Open up your feather shapes and ruffle the fringed edges with your fingers to help them separate. Fan & arrange the feathers and staple them together at the bottom.
Staple the feather cluster to the back of the headband on the inside. {{NOTE}} To avoid hair snags and skin scraps, position the staple to where the flat side of the staple is against the body.
I hope you have a festive holiday! Have fun & get messy! ~ Miss Jenna :-)


