Sunday, November 7, 2010

Silly Witch Heads

I was doing a google image search for witch faces to get a design inspiration for my pumpkin this year when I came across a painted lightbulb witch head.  I thought it might be a fun project to do with my friends children for a Halloween, but I decided to do a more kid friendly version.  Hmmm...something about easily shattering light bulbs in the rambunctious hands of young pre-schoolers just didn't jive with me as a safe idea.  I didn't make my own to test it out beforehand, so it was an experimental project day with Sam and Molly.  The photos I took are essentially before and after because this did require the helpful hands of adults...older kids (Elementary & Middle) could most definitely tackle this one on their own.
SUPPLIES:

  • Styrofoam balls (in size of your choice) - I had several white craft balls left over from the spider project, so I used and painted these, but you could also try the green floral foam balls (from any craft store) if you want an easy pre-greened face.
  • Acrylic paint & brush - I used green, but any color of your choice will do.
  • Witch hat - I found these in the doll making section of my craft store for little money, but you can craft your own out of black foam paper using the pattern below.
  • A length of ribbon (optional) - enough to wrap around the cone base of the witches hat
  • Button (optional) - for added hat decoration 
  • Tacky glue - be careful if you wish to try hot glue...it can and most likely will melt your styrofoam.  I used tacky glue (and requested patience from the kids while the witches dried) just to be safe.
  • Black Sharpie marker (Oh, how I LOVE the smell of a Sharpie!)
  • Red craft foam - for lips
  • Wiggly eyes - as many as you'd like
  • Black feathers - for hair
  • Tooth picks (2) - the prop your witch heads up for decoration OR (and I wish I had done this) ... with a needle and thread, knot and thread a length of fishing line or thread through the top of the witch hat and create a loop so you can hang your witch decoration.  I imagine this being much easier than angling the toothpicks perfectly to keep your witch head from rolling around.
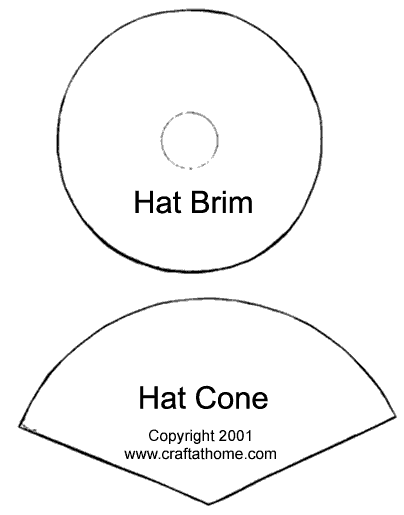
Found HERE

INSTRUCTIONS:
Paint your styrofoam ball.  {{{TIP}}} Because the styrofoam has so many tiny holes, it kind of takes a little more effort to get full coverage. Use a stippling technique (like you would if you were stenciling a wall).  Dot the bristles down onto the surface to help fill in the holes with paint.  Swirling the brush in circular motions also helps. Allow to fully dry before you continue.
Have the children count out how many eyes they's like their witch to have and dot some tacky glue in place and add the wiggly eyes.

With the Sharpie, have children draw a nose and smile (or frown if they decide their witch is not a happy one).

Cut some lip shapes out of the red craft foam.  If you want super easy lips....just cut out a small circle and then cut the circle in half.  The two semi-circles can work for top and bottom lips.  With the tacky glue, have the children glue them into place on the mouth they have drawn.
With your toothpicks, prop your witch heads so they can sit upright on their own and you can continue working on them without them rolling all around.
Like So...
With the tacky glue, adhere feathers to the underside of the hats brim (either the one that you bought or the one you made)...in a fashion that looks like crazy hair showing out of the hat.  Try to leave a space without feathers...so you'll be able to see the facial features.  Attach the witches hat (that now has feathery hair) to the styrofoam ball head...using the tacky glue.

Decorate the witch hats!  Have the children glue the length of ribbon to the hat and embellish with buttons if they so desire.

Molly chose the purple ribbon and red button for her "girl" tri-clops witch

Sam was not loving the idea of making a "girl" witch so I suggested that maybe it could be a Brujo (Spanish for male witch). 
Allow your Brujo or Bruja to dry and (of course) give them an awesome name.  Have fun & get messy! ~ Miss Jenna :-)


Saturday, November 6, 2010

Creepy Crawly Spiders!

These creepy crawly spiders are pretty easy and super awesome.  You might want to tackle the painting part yourself (either the day before or several hours before you jump into this project)...it takes a decent amount of effort to get good paint coverage on plain styrofoam balls and depending on the age of the child, they might get frustrated and tire of this part easily.  Don't let that little disclaimer talk you out of doing this though...it really is VERY easy.
SUPPLIES:
  • Styrofoam balls (in the size of your choice) - these can be found at any craft store
  • Serrated knife
  • Black acrylic paint - I bought a small bottle of glossy black (you won't need a ton for this).  {NOTE} I DON'T recommend using spray paint.  That may seem like the easier option, but a lot of aerosol paints or adhesives actually eat away the styrofoam.  There might be some out there that don't have this affect, but I wouldn't know what to recommend.
  • Medium sized paint brush - you don't need a fancy painters brush...a regular kid craft one will do
  • Your favorite brand of tacky glue - I like to use Aleene's Original Tacky Glue
  • Q-tips
  • Small container to hold a blob of glue - glass dish or even a small paper plate or square of card-stock will do
  • Wiggly eyes (as many as you want)
  • Black chenille pipe cleaners cut in half (enough for each spooky arachnid to have 8 legs) 

INSTRUCTIONS:
Slice your styrofoam balls in half with the serrated knife.  This is messy, so do it over a trash can or piece of newspaper to catch all the teeny tiny foam bits that fall.

Paint the bottom of the spider body with black acrylic paint.  {{{TIP}}} Because the styrofoam has so many tiny holes, it kind of takes a little more effort to get full coverage. Use a stippling technique (like you would if you were stenciling a wall).  Dot the bristles down onto the surface to help fill in the holes with paint.  Swirling the brush in circular motions also helps.  When the bottom is dry or dry-ish, paint the top of the spider body the same way.  Allow your spider bodies to fully dry before moving on.
It's always good to try to fit in a little counting practice.  Have the children count out their desired number of wiggly eyes.  

In your small glue container, place a blob of tacky glue and with the Q-tips, add dots of glue to where the wiggly eyes will go.  Gently press the wiggly eyes onto their designated gluey spots.

Have the children count out eight legs.  It's never a bad idea to insert a little lesson here and talk about our eight legged creepy arachnid friends!

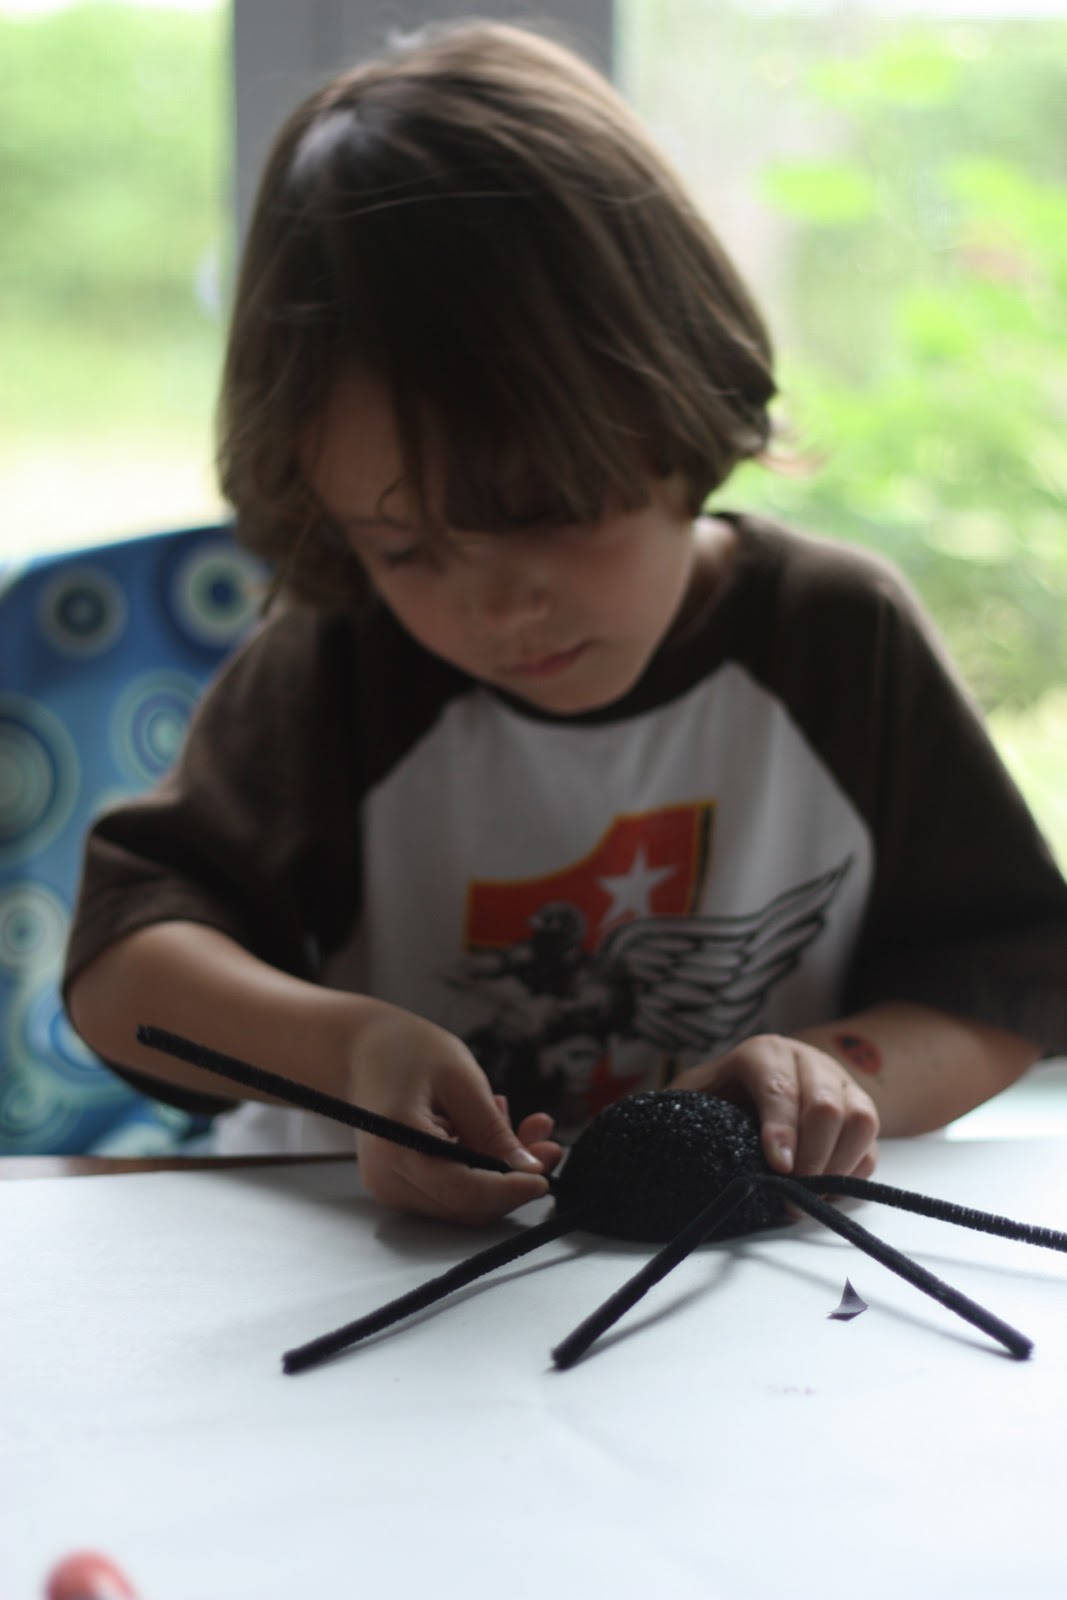
Poke the ends of the pipe cleaners into the sides of the spider bodies {{{TIP}}} have the children hold the pipe cleaners as close to the ends as possible.  This makes them easier to penetrate the styrofoam without bending all out of whack.  The legs should be stuck an inch or two into the body (so they don't easily fall out)
Little ones might need some help with this part
When all the legs are inserted, bend them in a 'Z' formation to prop them up....or leave them flat if you so desire.

Last (but certainly not least) Give your creepy creation a name!  Have fun & get messy! ~Miss Jenna :-)


Cut & Paste Jack-o-Lanterns (can't get much easier folks)

Hello Friends!  My apologies for not delivering timely project ideas for your little ankle-biters.  I'm not sure what my problem was exactly, but Halloween crafting posts really fell off my radar.  I did get together with Sam and Molly (my little ABA helpers) last week for some belated Halloween fun, so if you're not sick to death of spooky holiday stuff, check out what I did with the kids!  This is one of three projects we did that day.  Creepy spiders and silly witch heads to follow!

We started off with easy peasy lemon squeezy cut and paste Jack-o-Lanterns.  Since Molly is a youngen', I pre-cut her pumpkin and face shapes, but Sam is a big boy in pre-school now, starting to master the ways of the scissor.  Cutting is great for developing those very important fine motor skills, so little ones really benefit from lots of (supervised) scissor practice.
SUPPLIES:
  • Construction paper in colors orange, black and brown
  • White crayon or metallic marker (to draw face shapes on the black paper)
  • Pen, pencil or marker (if a child is cutting out the shapes you might want to draw them with a marker...a thicker line is usually easier for them to follow)
  • Child safe scissors
  • Glue stick

"I'm not a perfect cutter yet, but I do a pretty good job."
INSTRUCTIONS:
Draw out your eye, nose and mouth shapes on the black construction paper using a white crayon or metallic marker.  It's difficult (especially for the child cutting) to see the lines if drawn with a plain pen or pencil...the white or metallic shows up much better on the black.

Draw your pumpkin shape on the orange paper and a stem on the brown.

Cut out the shapes, assemble the Jack-o-Lantern face and adhere with the glue stick.  Super easy!  
We were all rockin' some pretty cool fake tattoo's that day.
On Molly, the robot tattoo and fluffy flowery dress match perfectly!

Well...this was not so messy (you know how I love to make a mess), but it was fun and chill.
I hope you all had a spooktacular Halloween!  ~ Miss Jenna  :-)


Friday, October 15, 2010

Hand Print Fall Trees

This is the third Autumnal project I've done so far that has involved leaves and I'm starting to think that I have a slight obsession with this thing they call "Fall Leaves".  This Florida girl thinks it's all a myth!  I have seen no such thing as Fall colors and the "changing of the leaves" ;-)  Anyway...this is a beautiful, fun & messy project for the little ankle-biters.
This is the idea...
SUPPLIES:
  • Large piece of medium weight paper: We used white poster paper (you can find this at most stores where school supplies are sold).
  • Paint brushes: One for painting the tree trunk (medium to large bristle tip) and a few smaller brushes to blend your colors.
  • Tempera paint: brown for the tree trunk and 3 to 4 Fall colors...we used green, red and yellow, but I wouldn't be mad at ya if you threw in a beautiful purple color too. 
  • Paint trays: I wash and re-use my styrofoam meat & produce trays from the super-market.
  • Hands!

INSTRUCTIONS:
[1.] Mix your paint - 
In a small cup or tray add your brown paint.  Have separate trays for your leaf colors...I added a tiny dab of brown to my green and red paint to make them look less like Spring and more like Autumn, but left the yellow as is.

[2.] With the brown paint and paint brush, demonstrate (on your own paper) or describe how to paint a tree trunk...sure that seems a bit simple, but I always took time before my class actually started the project to go over the main idea of what we are trying to accomplish...it doesn't matter what the child's tree trunk actually looks like.  What matters is that the child is painting with a purpose or idea in mind.  You could take a moment to go outside and look at different trees and discuss the trunks...

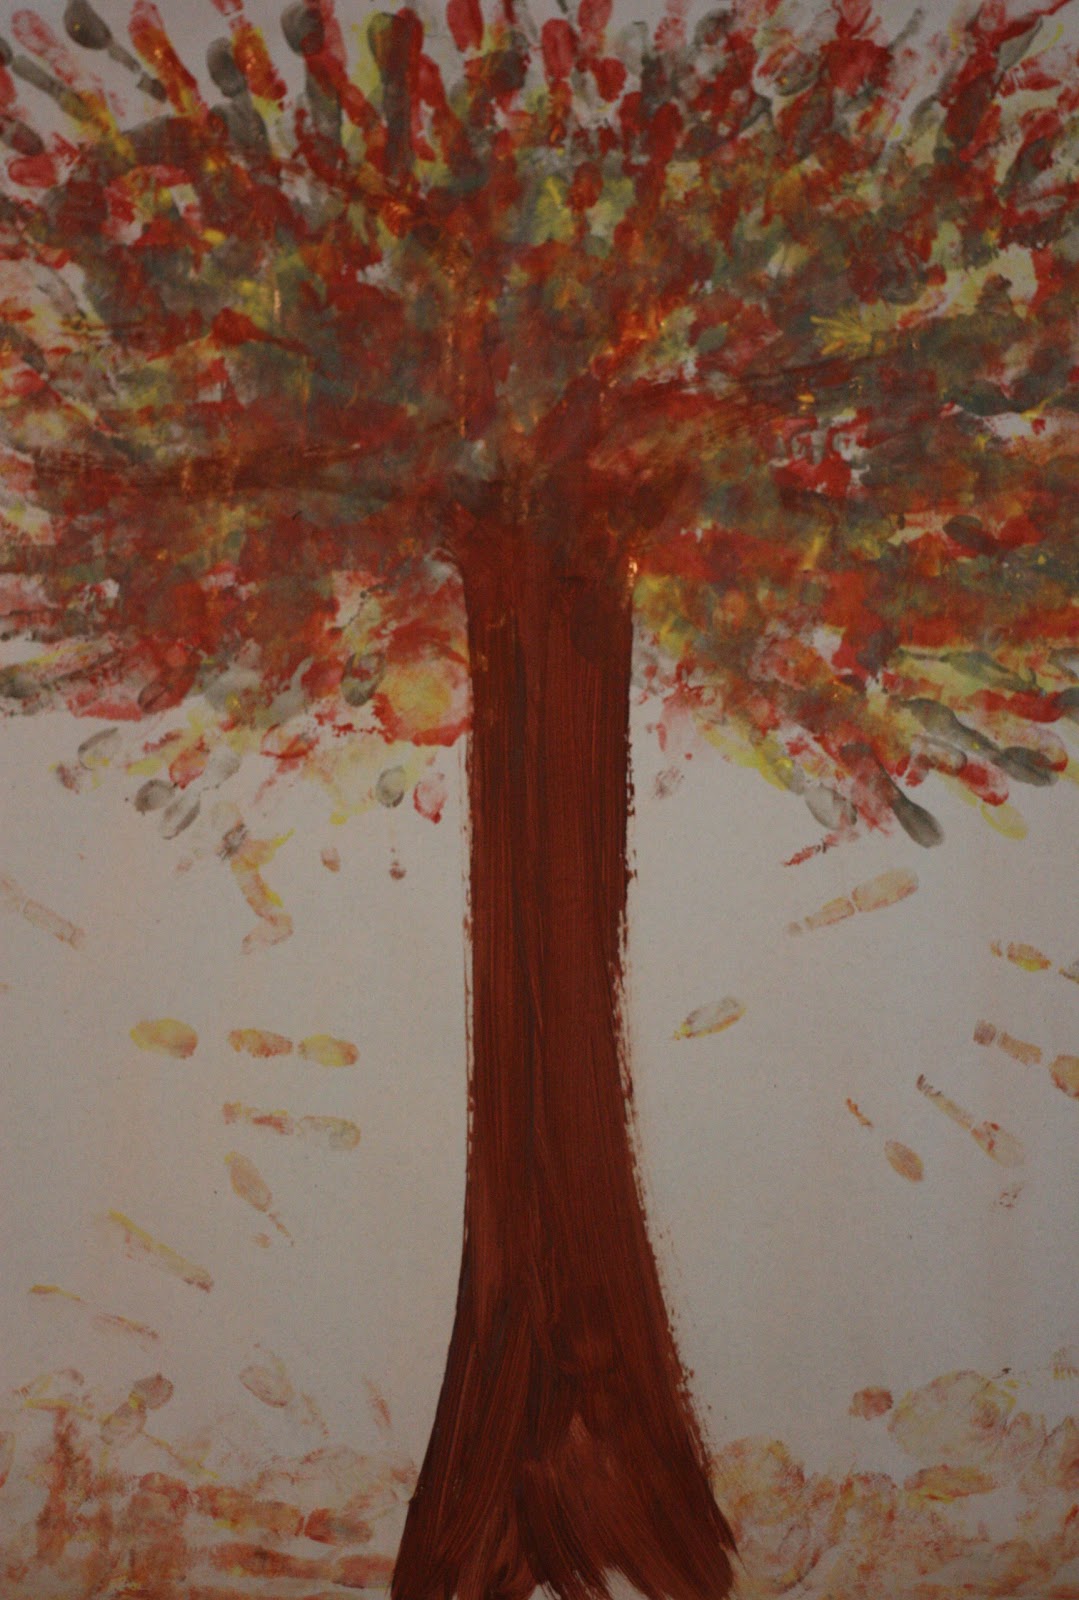
[3.] After the trunks are painted, remove the brown paint and paint brush from the equation and place the trays of colors down.  It's messy hands from here on out...  Have your child place their palm into a color and make handprints (these are the leaves) all over the top of the tree trunk...or wherever they feel their leaves should go.  Re-fill paint colors if needed.
My little helpers Sam & Molly

Sam decided to use his finger-tips to make small leaves on all of his branches.
And here are the finished pieces of gorgeous Ankle-Biter Art....
Fall Tree by: Sam
Fall Tree by: Molly


Have fun & get messy! ~ "Miss Jenna"


Sunday, October 10, 2010

"Magic Pumpkin" glue project

I borrowed my little Ankle-Biter Art helpers again for a fun Fall glue project.  This is totally easy and you don't need a lot of supplies.  The degree of messiness really depends on the children...I'll be getting to that later.  ;-)

SUPPLIES:
  • Pumpkin Shape: use a stencil (or free-hand) cut a pumpkin shape out of any stiff cardstock weight paper...OR...use a paper plate (this is a great substitute and it's already a similar shape).
  • Green Construction Paper (for a pumpkin stem): either pre-cut stems...OR...(if age appropriate) trace a stem shape on the green paper and have the child cut it out themselves.
  • Orange Tissue Paper: cut or torn into small-ish shapes
  • Elmer's glue
  • Orange Paint (or red & yellow paint to mix)
  • Glue Brushes: I gave my helpers small sponge brushes (in craft stores), but I used a regular brush for mixing up the glue.
  • Container (for glue): I like to re-use my plastic Thai take-out containers with lids so that any leftover glue can be saved for future projects.  Empty yogurt, butter or sour cream tubs w/ lids will work too.
  • The "Magic" ingredient: orange glitter or orange colored sand (these can be found at your local craft stores).

Magic Pumpkin Powder (a.k.a Sparkly orange sand)
I don't know where I got this super fine sparkly sand, but I've had it for YEARS and in several colors.  Until this project, the colors have been separated in sandwich bags (not exactly kid friendly).  The solution (as I'm sure you've noticed) is using an old spice shaker, but be sure you thoroughly wash & dry...my Magic Pumpkin Powder smelled an awful lot like Curry Powder.  {TIP} If, the stream of "magic" is too fast, use some tape to cover some of the shaker holes to slow the flow.

INSTRUCTIONS:
Mix your glue with the paint.  If you don't have orange paint, you can mix red & yellow paint to get an orange color (this makes a good little art lesson in color theory for the kiddos by the way :-).
Paint the pumpkin shape with the orange glue...and here's where I'm going to get back to my earlier comment about the degree of messiness and refer to my little helpers.  If you are Sam, you will paint your pumpkin with your sponge brush in an even, smooth layer.  However, if you are Sam's little sister Molly, you use your brush for the most part...BUT...make big puddles of glue, then pick up the glue container and ask (very politely) if she can just pour it onto her pumpkin.  :-)  {{{This is why you want to use a heavy weight paper}}}  Both of these methods of glue application are equally great and acceptable...and in the case of these two little friends of mine, very age appropriate.
Decorate the pumpkin shapes with the pieces of orange tissue paper.
Sam
I would like to pause here to love & acknowledge differences in personality (well...age plays a role in this case too).  When I taught pre-school, time and time again, I would be amused at how my kids' art would completely match their personalities.  This project with Sam and Molly was no different.  Sam placed his tissue pieces very deliberately one at a time and started to get a little flustered when glue accidentally fell on one of the pieces he had just put down, but we talked about how layering is an art technique and he was cool with layering a piece of paper atop of the glue mishap.  While Sam was patiently decorating his pumpkin, Molly put down the tissue by the fist full and drizzled more glue on top of her paper piles.  :-)
Molly
When the artists have decided that they are happy with the amount of tissue decoration, it's time to add the sparkly magic.
Sam shaking the magic all over his pumpkin
Conversations with children are often times more interesting & fun than conversations with adults.  Here's what we discussed when it was time for the "magic".

Sam: "Is this REAL magic or just pretend magic?"
Me: "Well, I think it's just pretend magic...BUT...this is the FIRST time I've ever used this magic pumpkin powder, so you never know!  It might turn into real magic."
Sam: "Yeah.  You never know!  It might really be magic.  What if it turned into a magic rocket ship?!"
Me: "That would be pretty amazing...and VERY surprising!"
Sam: "We would DEFINITELY have to tell the President if that happened."
Me: "Absolutely!  I think President Obama would really want to know about that."
Molly: "Who's Odama?"  :-)

Molly...yep, she poured the "magic pumpkin powder" in a steady up-side down stream until it was almost gone and then said..."Ooops...here you go.  I don't want to use ALL of it."  Hahahaha!
And there you have it folks...Magic Pumpkins!  The End.
Have fun & get messy!  ~ "Miss Jenna"


Monday, October 4, 2010

Marble Painting: Fall Leaves

FALL TUTORIAL:
Marble Painted Leaves
 a.k.a Roly Poly Painting  :-)

I borrowed my friends adorable children (Sam & Molly) to document this project...thanks T!  Marble painting is super easy, quick and each piece is unique.  It creates such a cool effect and could be used to decorate a nearly infinite number of fun shapes, but since it's Autumn, we painted leaves.
SUPPLIES:

  • Any box with a lid - small enough for a child to hold and easily manipulate (shoe boxes are perfect for this).
  • Paper - I recommend using cardstock...the leaves will get pretty wet and jostled about, so you want to use a thicker paper that won't tear.
  • Marbles (I like to use a larger sized marble) - I couldn't find marbles when I was shopping for this project.  If this happens to you (for some reason) you can substitute them with large wooden beads from a craft store...but marbles work better because they don't absorb the paint.
  • Tempera paint - any colors you like
  • Small containers (for the paint & marbles)

INSTRUCTIONS:
Enlarge or shrink as desired
Using a template (or free-hand), trace and cut out leaves from your cardstock.
Enlarge or shrink as desired
Mix your paint in your small containers with a tiny splash of water to make it a bit more fluid and add your marbles (or Roly Polies). 
Add some leaves to the box (being sure to not overcrowd them) and drop the marbles (which have been rolled around and covered in paint).
Put the lid on the box and have the children shake the box from side to side (for a few seconds), rolling the paint covered marbles all over the leaves.
Shake! Shake! Shake!
Roll the marbles back in the paint and repeat (if desired).
Lay your leaves out to dry....THE END!  

Have fun & get messy!  ~ Jenna ~  :-)


Saturday, October 2, 2010

Crayon Melts: Fall Leaves

FAUX STAINED GLASS-ish FALL LEAVES
with MELTED CRAYONS
I made crayon melts with my pre-school kids a long time ago, but after re-visiting this project, I remembered how much adult participation it takes.  It’s a cool project that uses materials you most likely already have in your home, but if you plan on doing this with young ankle-biters, realize that you will be doing most of the work.  On the plus side...it doesn’t take that much time.  Child participation really depends on you and the age of your child...how comfortable are you with your child using an iron? ...etc.  Supervision is the name of this game! 
SUPPLIES:
  • Crayons - this is a great way to use up all those broken crayons you may have lying around.  This projects works best when using really tiny bits of crayon, so shavings are ideal (use an old cheese grater or pencil sharpener).  You can also bash then up (like I did) in a plastic baggie using a hammer or rolling pin...just make sure the crayons are in tiny bits.  Crayon crushing could be fun for the kids if you allow it.  ;-)
  • Wax Paper - two equally large pieces
  • Ironing Board & Iron
  • Old Towel (that you don't have strong feelings for)
  • Paper Towels - enough for several layers
  • Leaf Template (or eyeball it if you can)
  • BlueStik re-usable mounting putty (for sticking leaves to window) - I find it works better than tape on the wax paper. It’s great stuff...comes off cleanly & easily, but holds really well. I use it all over my house.
  • (Optional Supplies) - whole punch, fishing line, brown construction paper (for a trunk if you want to add to your leaves for a fall tree decoration.
  • Sharpie permanent marker
INSTRUCTIONS:
Turn your crayons into rubble or shavings  (remember that finer = better)
Place the not so loved towel on your ironing board and then one sheet of wax paper atop the towel.
Sprinkle your colorful rubble onto the wax paper, spread it out and cover with the second layer of wax paper...
like so
Place several 3-4 layers of paper towel (or another cloth towel that you don’t love) over the wax paper sandwich.  YOU WANT TO DO THIS...it protects your iron from getting all waxy.
Now it’s time for your iron (which is set to medium to medium high heat and WITHOUT steam) ... in sections, press and hold for a few seconds, being sure to cover all the waxy territory.
Firmly smooth your iron all over and smell the melty crayon goodness.
Lift up the paper towels and sneak a peek every now and then to see if all your colors are melted and marbling together.
...should look something like this
Enlarge or shrink as you wish
Using a template (or free-hand), lightly trace a leaf shape on your cooled sheet of wax (a Sharpie is a bit better on the waxy surface)...you can also just cut blindly without a traced image if you have the skills (this eliminates the marker lines).  You can make one huge leaf to put in your window, or cut out lots of smaller leaves.

Because the crayon cools and hardens, cutting can break up the wax along the edges.  After your shapes are cut, place your leaf/leaves back in-between the towel sandwich and run your iron over them again to re-melt and seal the edges.
See how the edges are separated?  Back under the heat they go!
WHAT TO DO WITH YOUR FALL LEAVES! (anything that involves a window and light)  
Punch a hole (with your hole puncher) and hang them in front of a window with fishing line.  They look so pretty swaying and twirling in the air. 
Cut a tree trunk out of a piece of brown construction paper and make a tree window decoration.  Attach the trunk and leaves to the window using the BlueStik mounting putty (or you could try little tape rolls).
Or...just stick them to the window and call it macaroni.  Have fun & get messy!  ~ Jenna