Tuesday, December 14, 2010

Popsicle Stick Ornaments

Oh, the things you can do with popsicle sticks!  This instructional will show you how to make these three holiday popsicle crafts that can be used as ornaments AND/OR....
...in decorative gift wrapping!  The supply list is the same for all three projects AND you don't need that much!  Easy peezy lemon squeezy.

SUPPLIES:
  • Popsicle sticks
  • Glue - hot glue (if you want instant results) & tacky glue
  • Paint & paintbrush - in the colors of your choice
  • Glitter - in the colors of your choice
  • Ribbon

TRADITIONAL STAR ☆
1.) Cut 5 popsicle sticks in half.
2.) Hot glue (or tacky glue and let dry for a few minutes) the rounded sides of two popsicle halves together in the shape of a tee-pee (or letter V if it's upside down).  You can draw the intended angle on a piece of paper for the children to copy the shape if that helps.  REPEAT this step until all of the pieces are glued and you have five V's.
3. & 4.) Glue an open end of one of the V to the open end of another to start forming your star shape.  {TIP} Drawing a star for the children to visualize how the puzzle pieces fit could be helpful.
If using tacky glue, allow your star to dry before moving on to the painting.  If using hot glue....nevermind that previous statement.
5.) Paint your star whatever color you'd like and allow to dry for a few minutes (you could take a hairdryer to it to speed up the process).  Coverage will depend on what type of paint you use.  Acrylics will cover better while tempera (or poster) paint tends to absorb into the wood and not cover as well....BUT both will work.  Add a second coat of paint (I did because I used tempera paint) if you'd like your color more vivid & solid and let your star dry.  Repeat this step on the backside of your star (optional).
6.) When your paint is dry, add a line of tacky glue along the whole star and spread the glue out with your finger (or brush) to cover the popsicle sticks and add glitter. 
7.) Glue a loop of ribbon to the backside of your star and let it dry.

SNOWFLAKE
For the snowflake you'll need 4 popsicle sticks.
1.) Add a dab of hot (or tacky glue) to the center of a popsicle stick and cross it with another.
2.) Add another dab of glue to the center of the top popsicle and cross it with another stick.
3.) Continue crossing the the sticks (glueing them together at each level in the center) until all 4 of your sticks are used up.
4.) Paint your snowflake white.  Apply a second coat of paint if you'd like better coverage (allowing dry time in-between coats).  Repeat on the backside (optional).
5.) With a glue brush, apply glue to the entire frontside of your snowflake and sprinkle with clear or white glitter.
6.) Glue a loop of ribbon the backside and allow it to dry.

STAR OF DAVID
To include our friends who celebrate Hanukkah, you'll need 6 popsicle sticks for this star of David.
1.) Glue 3 popsicle sticks in the shape of a triangle with hot glue (or tacky glue and let it dry).  Repeat this step so you have two triangles.
2.) Flip one triangle upside down and layer the two opposing triangles adding glue in the spots where the two pieces touch.
3.) Paint (as instructed before) and glue blue glitter.

THE END.  Have fun & get messy!  ~ Miss Jenna

Monday, December 6, 2010

Gingerbread Garland

Photo & Instructions from Kaboose.com  - with a few personal alterations ;-)

Today, I'm sharing a fun project idea from Kaboose.com - Add some cuteness to your holiday home decor!  The level of ankle-biter involvement depends on the age of the child(ren).  If they are older and well practiced in scissor cutting, they can tackle this project with little to no adult involvement.   If your kids are young, do the cutting yourself and let them decorate.  

I'd like to offer an alternative to the instructions to paint the gingerbread garland.  If the ankle-biters are young, your garland is at risk of tearing, especially if they are a child that loves to drown their beloved projects in paint.  The grocery bag paper is pretty heavy, but may succumb to wetness.  Instead, try using  some inexpensive oil pastels!  They are soft in consistency, so the color will transfer easily.  Also, the colors will be more vibrant on the brown paper than using regular crayons, colored pencils or markers.  Crayola makes some good oil pastels and they are very affordable.  You can find them in most craft stores and home stores (like Target & Walmart).

SUPPLIES:
  • Brown paper grocery bag (this is a good time to recycle your paper bags!)
  • Gingerbread girl and boy cookie cutters
  • Pencil
  • Scissors
  • Acrylic paint: white, red, pink, purple, orange, green, light blue, black OR oil pastels
  • Paintbrush (if using paint)
  • Glue or Tape
  • Yarn


INSTRUCTIONS:

  1. Cut a 7” wide strip the length of the paper grocery bag.
  2. Decide which side you want to be the front and turn over so that the back is facing up.
  3. Place gingerbread boy cookie cutter at the left side of the paper strip. Use pencil to trace the outline of the cookie cutter.
  4. Place gingerbread girl cookie cutter just to the right of the tracing of the boy gingerbread and trace with pencil.
  5. Repeat steps 3 and 4 until you run out of room on the paper.
  6. Use scissors to cut the outlines of the gingerbread people out, keeping them connected. Do not cut the gingerbread people out separately. If need be, cut around your tracing marks rather than on them to give yourself “padding” which will make up for any gaps between the tracings.
  7. Turn paper over so that your pencil marks are now facing down.
  8. DECORATE with your paint or oil pastels!  Dot buttons on by dipping the handle end of the paintbrush into the paint and then onto your paper.  Use thin paintbrush (or oil pastels) to add the “rick-rack” squiggles with white paint around wrists, ankles, and skirts.  Use a thin paintbrush or black marker to add smiles them dot on pink for cheeks with handle end of paintbrush.  Dot on eyes with black or dark brown and paint on red bowties for the boys.  Whatever your creative heart desires!
  9. Glue or tape a loop of yarn to the backs of each end piece so you are able to hang your garland.
TIPS:
  • Craft paper will work in place of a brown paper grocery bag. You can also use brown construction paper.
  • Cut individual gingerbreads to glue to cards and packages.
  • Always have some back-up Scotch tape to fix any tears.  Just line up the ripped gingerbread man and place a strip of tape to the backside.
Have fun & get messy!  ~ Miss Jenna  

Friday, November 19, 2010

Thanksgiving Hats

Which hat will your ankle-biters wear?
When I taught pre-school, we made these hats every year at Thanksgiving time.  They are SOOOO unoriginal and every school in America probably makes them, but I guess that's also what makes them a traditional children's holiday craft.  So, this year, what hat will YOU wear?

PILGRIM BONNET 
SUPPLIES:
  • 12" x 15" sheet of heavy white paper (I used poster paper)
  • White yarn or ribbon
  • Hole punch
  • Scissors
  • Stapler

diagram from makingfriends.com

For INSTRUCTIONS:
click HERE!


PILGRIM HAT
SUPPLIES:
  • Black heavy weight paper - I used construction paper (because that's what I had), but poster paper would probably be better
  • 2" strip of heavy weight poster paper - measured and cut to fit the wearers head
  • 3" x 3" square of yellow construction paper
  • Glue stick
  • Stapler

INSTRUCTIONS:
1.) Cut the shape of a basic top hat out of the black paper.
2.) Trace a square (about 1 1/2 x 2 inches) inside the yellow square of paper and cut it out.  Measure, cut and staple the white headband strip.
3.) With the glue stick, add a think line of glue to the hat (just above the brim section).
4.) Attach the hat to the inside of the white strip.  Press & hold (the black paper will form to the contour of the headband. 
5.) With the glue stick, attach the yellow cut out square (the buckle) to the outside of the white band.


NATIVE AMERICAN HEADDRESS
SUPPLIES:
  • 2" strip of heavy weight poster paper - measured and cut to fit the wearers head
  • Crayons, markers or colored pencils
  • Stapler
  • Construction paper in colors red, yellow and orange
  • Scissors

INSTRUCTIONS:
Measure and cut the length of white paper for the headband and decorate with the drawing utensils.  If the children are old enough to replicate patterns, try introducing some images of Native American motifs. A quick Google image search can yield a lot of inspiration.  Otherwise, allow children to free draw on their headbands.
FOR THE FEATHERS
1.) Fold strips of construction paper in half (you can vary the sizes) and draw a pointed semi-oval on the folded side.
2.) Cut out the shape on the folded half of the paper.  You should now have a full feather shape when opened up.
3.) Fold the feather in half again and (with the scissors) make diagonal snips down the length of the side without the fold.
4.) Open up your feather shapes and ruffle the fringed edges with your fingers to help them separate. Fan & arrange the feathers and staple them together at the bottom.
 Staple the feather cluster to the back of the headband on the inside.  {{NOTE}} To avoid hair snags and skin scraps, position the staple to where the flat side of the staple is against the body.

I hope you have a festive holiday!  Have fun & get messy!  ~ Miss Jenna :-)

Thursday, November 18, 2010

Thanksgiving Napkin Holders

I came across this fabulous project while surfing the web and loved it SO much that I just had to share it.  It's from First Palette.  This would be an excellent family project and you only need a few (mostly common household) supplies!

Make your Thanksgiving table look festive with these crafty napkin holders!

SUPPLIES:
  • A variety of  seeds, beans, rice, corn, spices, etc...
  • Toilet paper tubes
  • White glue (at full strength) or tacky glue
  • Craft knife
  • Tempera or Acrylic paint
  • Paint brush


FOR INSTRUCTIONS:

Some Thanksgiving I'll make a set of my own...just not THIS Thanksgiving.  The holidays are sneaking up on me so fast this year...all ninja style.  Have fun & get messy!  ~ Miss Jenna :-)

Wednesday, November 17, 2010

Handprint Turkey

I mean really....what CAN'T you do with a handprint?!

SUPPLIES:
  • Paper - cardstock weight
  • Tempera Paint - in colors brown, red, orange, and yellow
  • Paint Brushes - one for each color
  • Black Sharpie Marker
  • Crayons, colored pencils or markers - whatever you have
  • Hand (of course)

INSTRUCTIONS:
Paint the palm of the hand and thumb with the brown paint and then paint the remaining four fingers with the other colors.
Like So...

Place the hand on paper to make the print and let it dry...dry time should be about 5 minutes or less.

The thumb print is the Turkey's head.  With the Sharpie marker draw an eye and legs & feet.  With your other drawing supplies (crayons, colored pencils, markers) add the remaining features of the turkey...beak & gobbler.  Now, give your turkey a pretty background!  Have your ankle-biters fill in the rest of the page with their very own scene.  The End!  Have fun and get messy! ~ Miss Jenna :-)


Sunday, November 7, 2010

Foot & Handprint Ghosts

These ghosts are so fun and easy.

SUPPLIES:
  • Black poster paper
  • White & Black Tempera paint
  • Paint brush
  • Wiggly eyes (optional)
  • Q-tip
  • Scissors
  • Hands & Feet
  • Glue (only if you are using wiggle eyes)
  • Fine tip Sharpie (optional)


INSTRUCTIONS:
Paint bare hands and feet with the white tempera paint and stamp onto the black poster paper.
Like so...
Allow to dry (should take about 5-10 minutes depending on how thick the paint was applied)...you could use a hairdryer to speed this up if you're impatient ;-)

Cut out your feet and hand prints.  You could do this yourself or trace a line around the prints and have your ankle-biters cut them out with child-safe scissors.

Rotate your feet and hand prints so the toes & fingers are at the bottom.  You want the heel and palm to be the place where you add the ghost face.

Give your ghost some eyes!  You can add a dab of glue and adhere wiggle eyes OR with your Q-tip, dip it in black paint and paint little ovals for eyes.

If you want to give your ghost some eyelashes, do so with the Sharpie.

Every ghost needs a mouth to make those spooky "Oooooooo's"!  Add one by dipping your Q-tip in black paint and painting an oval.  THE END!  :-)
Have fun & get messy!  ~ Miss Jenna :-)


Silly Witch Heads

I was doing a google image search for witch faces to get a design inspiration for my pumpkin this year when I came across a painted lightbulb witch head.  I thought it might be a fun project to do with my friends children for a Halloween, but I decided to do a more kid friendly version.  Hmmm...something about easily shattering light bulbs in the rambunctious hands of young pre-schoolers just didn't jive with me as a safe idea.  I didn't make my own to test it out beforehand, so it was an experimental project day with Sam and Molly.  The photos I took are essentially before and after because this did require the helpful hands of adults...older kids (Elementary & Middle) could most definitely tackle this one on their own.
SUPPLIES:

  • Styrofoam balls (in size of your choice) - I had several white craft balls left over from the spider project, so I used and painted these, but you could also try the green floral foam balls (from any craft store) if you want an easy pre-greened face.
  • Acrylic paint & brush - I used green, but any color of your choice will do.
  • Witch hat - I found these in the doll making section of my craft store for little money, but you can craft your own out of black foam paper using the pattern below.
  • A length of ribbon (optional) - enough to wrap around the cone base of the witches hat
  • Button (optional) - for added hat decoration 
  • Tacky glue - be careful if you wish to try hot glue...it can and most likely will melt your styrofoam.  I used tacky glue (and requested patience from the kids while the witches dried) just to be safe.
  • Black Sharpie marker (Oh, how I LOVE the smell of a Sharpie!)
  • Red craft foam - for lips
  • Wiggly eyes - as many as you'd like
  • Black feathers - for hair
  • Tooth picks (2) - the prop your witch heads up for decoration OR (and I wish I had done this) ... with a needle and thread, knot and thread a length of fishing line or thread through the top of the witch hat and create a loop so you can hang your witch decoration.  I imagine this being much easier than angling the toothpicks perfectly to keep your witch head from rolling around.
Found HERE

INSTRUCTIONS:
Paint your styrofoam ball.  {{{TIP}}} Because the styrofoam has so many tiny holes, it kind of takes a little more effort to get full coverage. Use a stippling technique (like you would if you were stenciling a wall).  Dot the bristles down onto the surface to help fill in the holes with paint.  Swirling the brush in circular motions also helps. Allow to fully dry before you continue.
Have the children count out how many eyes they's like their witch to have and dot some tacky glue in place and add the wiggly eyes.

With the Sharpie, have children draw a nose and smile (or frown if they decide their witch is not a happy one).

Cut some lip shapes out of the red craft foam.  If you want super easy lips....just cut out a small circle and then cut the circle in half.  The two semi-circles can work for top and bottom lips.  With the tacky glue, have the children glue them into place on the mouth they have drawn.
With your toothpicks, prop your witch heads so they can sit upright on their own and you can continue working on them without them rolling all around.
Like So...
With the tacky glue, adhere feathers to the underside of the hats brim (either the one that you bought or the one you made)...in a fashion that looks like crazy hair showing out of the hat.  Try to leave a space without feathers...so you'll be able to see the facial features.  Attach the witches hat (that now has feathery hair) to the styrofoam ball head...using the tacky glue.

Decorate the witch hats!  Have the children glue the length of ribbon to the hat and embellish with buttons if they so desire.

Molly chose the purple ribbon and red button for her "girl" tri-clops witch

Sam was not loving the idea of making a "girl" witch so I suggested that maybe it could be a Brujo (Spanish for male witch). 
Allow your Brujo or Bruja to dry and (of course) give them an awesome name.  Have fun & get messy! ~ Miss Jenna :-)


Saturday, November 6, 2010

Creepy Crawly Spiders!

These creepy crawly spiders are pretty easy and super awesome.  You might want to tackle the painting part yourself (either the day before or several hours before you jump into this project)...it takes a decent amount of effort to get good paint coverage on plain styrofoam balls and depending on the age of the child, they might get frustrated and tire of this part easily.  Don't let that little disclaimer talk you out of doing this though...it really is VERY easy.
SUPPLIES:
  • Styrofoam balls (in the size of your choice) - these can be found at any craft store
  • Serrated knife
  • Black acrylic paint - I bought a small bottle of glossy black (you won't need a ton for this).  {NOTE} I DON'T recommend using spray paint.  That may seem like the easier option, but a lot of aerosol paints or adhesives actually eat away the styrofoam.  There might be some out there that don't have this affect, but I wouldn't know what to recommend.
  • Medium sized paint brush - you don't need a fancy painters brush...a regular kid craft one will do
  • Your favorite brand of tacky glue - I like to use Aleene's Original Tacky Glue
  • Q-tips
  • Small container to hold a blob of glue - glass dish or even a small paper plate or square of card-stock will do
  • Wiggly eyes (as many as you want)
  • Black chenille pipe cleaners cut in half (enough for each spooky arachnid to have 8 legs) 

INSTRUCTIONS:
Slice your styrofoam balls in half with the serrated knife.  This is messy, so do it over a trash can or piece of newspaper to catch all the teeny tiny foam bits that fall.

Paint the bottom of the spider body with black acrylic paint.  {{{TIP}}} Because the styrofoam has so many tiny holes, it kind of takes a little more effort to get full coverage. Use a stippling technique (like you would if you were stenciling a wall).  Dot the bristles down onto the surface to help fill in the holes with paint.  Swirling the brush in circular motions also helps.  When the bottom is dry or dry-ish, paint the top of the spider body the same way.  Allow your spider bodies to fully dry before moving on.
It's always good to try to fit in a little counting practice.  Have the children count out their desired number of wiggly eyes.  

In your small glue container, place a blob of tacky glue and with the Q-tips, add dots of glue to where the wiggly eyes will go.  Gently press the wiggly eyes onto their designated gluey spots.

Have the children count out eight legs.  It's never a bad idea to insert a little lesson here and talk about our eight legged creepy arachnid friends!

Poke the ends of the pipe cleaners into the sides of the spider bodies {{{TIP}}} have the children hold the pipe cleaners as close to the ends as possible.  This makes them easier to penetrate the styrofoam without bending all out of whack.  The legs should be stuck an inch or two into the body (so they don't easily fall out)
Little ones might need some help with this part
When all the legs are inserted, bend them in a 'Z' formation to prop them up....or leave them flat if you so desire.

Last (but certainly not least) Give your creepy creation a name!  Have fun & get messy! ~Miss Jenna :-)


Cut & Paste Jack-o-Lanterns (can't get much easier folks)

Hello Friends!  My apologies for not delivering timely project ideas for your little ankle-biters.  I'm not sure what my problem was exactly, but Halloween crafting posts really fell off my radar.  I did get together with Sam and Molly (my little ABA helpers) last week for some belated Halloween fun, so if you're not sick to death of spooky holiday stuff, check out what I did with the kids!  This is one of three projects we did that day.  Creepy spiders and silly witch heads to follow!

We started off with easy peasy lemon squeezy cut and paste Jack-o-Lanterns.  Since Molly is a youngen', I pre-cut her pumpkin and face shapes, but Sam is a big boy in pre-school now, starting to master the ways of the scissor.  Cutting is great for developing those very important fine motor skills, so little ones really benefit from lots of (supervised) scissor practice.
SUPPLIES:
  • Construction paper in colors orange, black and brown
  • White crayon or metallic marker (to draw face shapes on the black paper)
  • Pen, pencil or marker (if a child is cutting out the shapes you might want to draw them with a marker...a thicker line is usually easier for them to follow)
  • Child safe scissors
  • Glue stick

"I'm not a perfect cutter yet, but I do a pretty good job."
INSTRUCTIONS:
Draw out your eye, nose and mouth shapes on the black construction paper using a white crayon or metallic marker.  It's difficult (especially for the child cutting) to see the lines if drawn with a plain pen or pencil...the white or metallic shows up much better on the black.

Draw your pumpkin shape on the orange paper and a stem on the brown.

Cut out the shapes, assemble the Jack-o-Lantern face and adhere with the glue stick.  Super easy!  
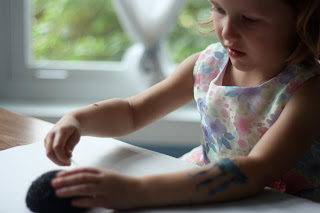
We were all rockin' some pretty cool fake tattoo's that day.
On Molly, the robot tattoo and fluffy flowery dress match perfectly!

Well...this was not so messy (you know how I love to make a mess), but it was fun and chill.
I hope you all had a spooktacular Halloween!  ~ Miss Jenna  :-)


Friday, October 15, 2010

Hand Print Fall Trees

This is the third Autumnal project I've done so far that has involved leaves and I'm starting to think that I have a slight obsession with this thing they call "Fall Leaves".  This Florida girl thinks it's all a myth!  I have seen no such thing as Fall colors and the "changing of the leaves" ;-)  Anyway...this is a beautiful, fun & messy project for the little ankle-biters.
This is the idea...
SUPPLIES:
  • Large piece of medium weight paper: We used white poster paper (you can find this at most stores where school supplies are sold).
  • Paint brushes: One for painting the tree trunk (medium to large bristle tip) and a few smaller brushes to blend your colors.
  • Tempera paint: brown for the tree trunk and 3 to 4 Fall colors...we used green, red and yellow, but I wouldn't be mad at ya if you threw in a beautiful purple color too. 
  • Paint trays: I wash and re-use my styrofoam meat & produce trays from the super-market.
  • Hands!

INSTRUCTIONS:
[1.] Mix your paint - 
In a small cup or tray add your brown paint.  Have separate trays for your leaf colors...I added a tiny dab of brown to my green and red paint to make them look less like Spring and more like Autumn, but left the yellow as is.

[2.] With the brown paint and paint brush, demonstrate (on your own paper) or describe how to paint a tree trunk...sure that seems a bit simple, but I always took time before my class actually started the project to go over the main idea of what we are trying to accomplish...it doesn't matter what the child's tree trunk actually looks like.  What matters is that the child is painting with a purpose or idea in mind.  You could take a moment to go outside and look at different trees and discuss the trunks...

[3.] After the trunks are painted, remove the brown paint and paint brush from the equation and place the trays of colors down.  It's messy hands from here on out...  Have your child place their palm into a color and make handprints (these are the leaves) all over the top of the tree trunk...or wherever they feel their leaves should go.  Re-fill paint colors if needed.
My little helpers Sam & Molly

Sam decided to use his finger-tips to make small leaves on all of his branches.
And here are the finished pieces of gorgeous Ankle-Biter Art....
Fall Tree by: Sam
Fall Tree by: Molly


Have fun & get messy! ~ "Miss Jenna"


Sunday, October 10, 2010

"Magic Pumpkin" glue project

I borrowed my little Ankle-Biter Art helpers again for a fun Fall glue project.  This is totally easy and you don't need a lot of supplies.  The degree of messiness really depends on the children...I'll be getting to that later.  ;-)

SUPPLIES:
  • Pumpkin Shape: use a stencil (or free-hand) cut a pumpkin shape out of any stiff cardstock weight paper...OR...use a paper plate (this is a great substitute and it's already a similar shape).
  • Green Construction Paper (for a pumpkin stem): either pre-cut stems...OR...(if age appropriate) trace a stem shape on the green paper and have the child cut it out themselves.
  • Orange Tissue Paper: cut or torn into small-ish shapes
  • Elmer's glue
  • Orange Paint (or red & yellow paint to mix)
  • Glue Brushes: I gave my helpers small sponge brushes (in craft stores), but I used a regular brush for mixing up the glue.
  • Container (for glue): I like to re-use my plastic Thai take-out containers with lids so that any leftover glue can be saved for future projects.  Empty yogurt, butter or sour cream tubs w/ lids will work too.
  • The "Magic" ingredient: orange glitter or orange colored sand (these can be found at your local craft stores).

Magic Pumpkin Powder (a.k.a Sparkly orange sand)
I don't know where I got this super fine sparkly sand, but I've had it for YEARS and in several colors.  Until this project, the colors have been separated in sandwich bags (not exactly kid friendly).  The solution (as I'm sure you've noticed) is using an old spice shaker, but be sure you thoroughly wash & dry...my Magic Pumpkin Powder smelled an awful lot like Curry Powder.  {TIP} If, the stream of "magic" is too fast, use some tape to cover some of the shaker holes to slow the flow.

INSTRUCTIONS:
Mix your glue with the paint.  If you don't have orange paint, you can mix red & yellow paint to get an orange color (this makes a good little art lesson in color theory for the kiddos by the way :-).
Paint the pumpkin shape with the orange glue...and here's where I'm going to get back to my earlier comment about the degree of messiness and refer to my little helpers.  If you are Sam, you will paint your pumpkin with your sponge brush in an even, smooth layer.  However, if you are Sam's little sister Molly, you use your brush for the most part...BUT...make big puddles of glue, then pick up the glue container and ask (very politely) if she can just pour it onto her pumpkin.  :-)  {{{This is why you want to use a heavy weight paper}}}  Both of these methods of glue application are equally great and acceptable...and in the case of these two little friends of mine, very age appropriate.
Decorate the pumpkin shapes with the pieces of orange tissue paper.
Sam
I would like to pause here to love & acknowledge differences in personality (well...age plays a role in this case too).  When I taught pre-school, time and time again, I would be amused at how my kids' art would completely match their personalities.  This project with Sam and Molly was no different.  Sam placed his tissue pieces very deliberately one at a time and started to get a little flustered when glue accidentally fell on one of the pieces he had just put down, but we talked about how layering is an art technique and he was cool with layering a piece of paper atop of the glue mishap.  While Sam was patiently decorating his pumpkin, Molly put down the tissue by the fist full and drizzled more glue on top of her paper piles.  :-)
Molly
When the artists have decided that they are happy with the amount of tissue decoration, it's time to add the sparkly magic.
Sam shaking the magic all over his pumpkin
Conversations with children are often times more interesting & fun than conversations with adults.  Here's what we discussed when it was time for the "magic".

Sam: "Is this REAL magic or just pretend magic?"
Me: "Well, I think it's just pretend magic...BUT...this is the FIRST time I've ever used this magic pumpkin powder, so you never know!  It might turn into real magic."
Sam: "Yeah.  You never know!  It might really be magic.  What if it turned into a magic rocket ship?!"
Me: "That would be pretty amazing...and VERY surprising!"
Sam: "We would DEFINITELY have to tell the President if that happened."
Me: "Absolutely!  I think President Obama would really want to know about that."
Molly: "Who's Odama?"  :-)

Molly...yep, she poured the "magic pumpkin powder" in a steady up-side down stream until it was almost gone and then said..."Ooops...here you go.  I don't want to use ALL of it."  Hahahaha!
And there you have it folks...Magic Pumpkins!  The End.
Have fun & get messy!  ~ "Miss Jenna"